
When my sister was in elementary school, one day each year was devoted to “Multiculturalism Around the World”. On this day, the lunchroom was transformed into a kind of culinary bizarre where each student should bring in a food item to share with their class to represent their heritage.
My mother, mightily dutiful to the plenteous needs of her three daughters, but at the same time a full-time lawyer, had to be clever. A full blown observance of her Costa Rican and Panamanian ancestry would have required the sacrifice of night hours she should have been..you know.. sleeping. And so she decided to make a recipe much loved in our house. Meanwhile, she told my sister to tell the teacher it was “plantain bread”.
Plantain bread, ha! ‘Plantain bread’ summons images of a somber, dense brick, does it not? What my sister passed around that day was tender and sweet. Of course it was. It was the dog-eared banana cake recipe from my mother’s 1965 edition of the Fannie Farmer cookbook, fragrant with butter, sugar, vanilla, and banana mash.
Now, I am not a baking expert, but it seems to me that any adult who’d tasted a plantain would know very well that there was not an ounce of plantain to be found in my sister’s contribution. And yet, the teacher was so pleased with the results that she asked for the recipe to make at her own family’s Easter lunch!
Meanwhile, my family still loves my mother’s..ehem..’plantain bread’. I’ve given it a little update here, with the addition of some golden sugar and a sprinkling of lemon zest, but it’s a reliable recipe even without it and a keeper. My mother assures me that the new editions of Fannie Farmer have moved on to other, lesser adaptations of the 1965 version, so I suppose we are lucky that my mother held on to her old copy, even if it is falling apart at the seams.
A few notes on this recipe: It is best to use very, very ripe bananas. Bananas that are so brown on the outside, you wouldn’t think to eat them as they are.
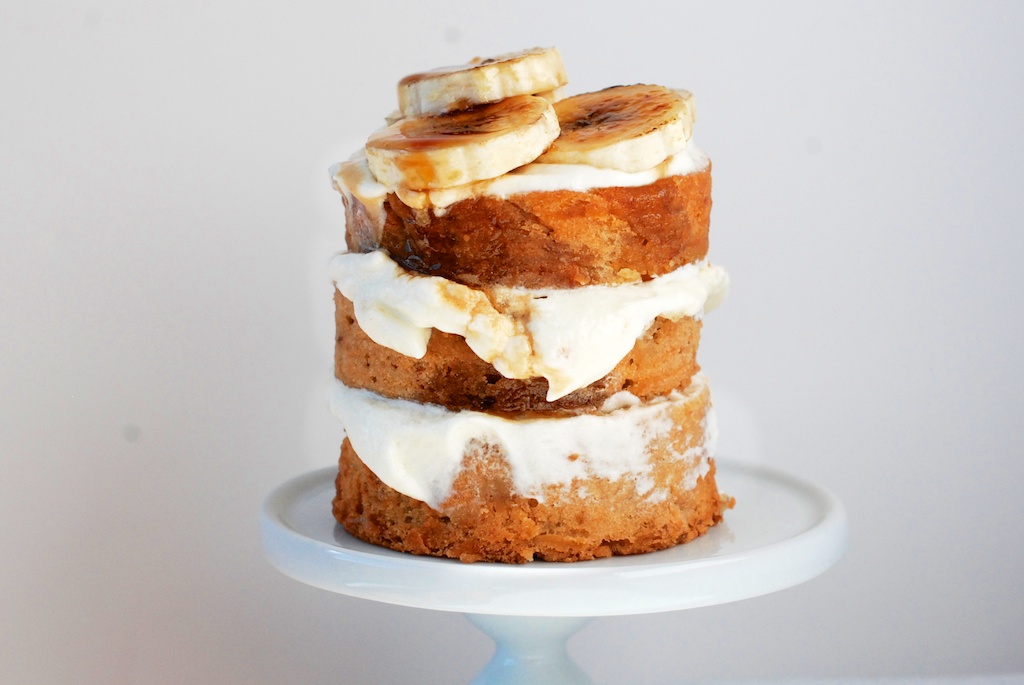
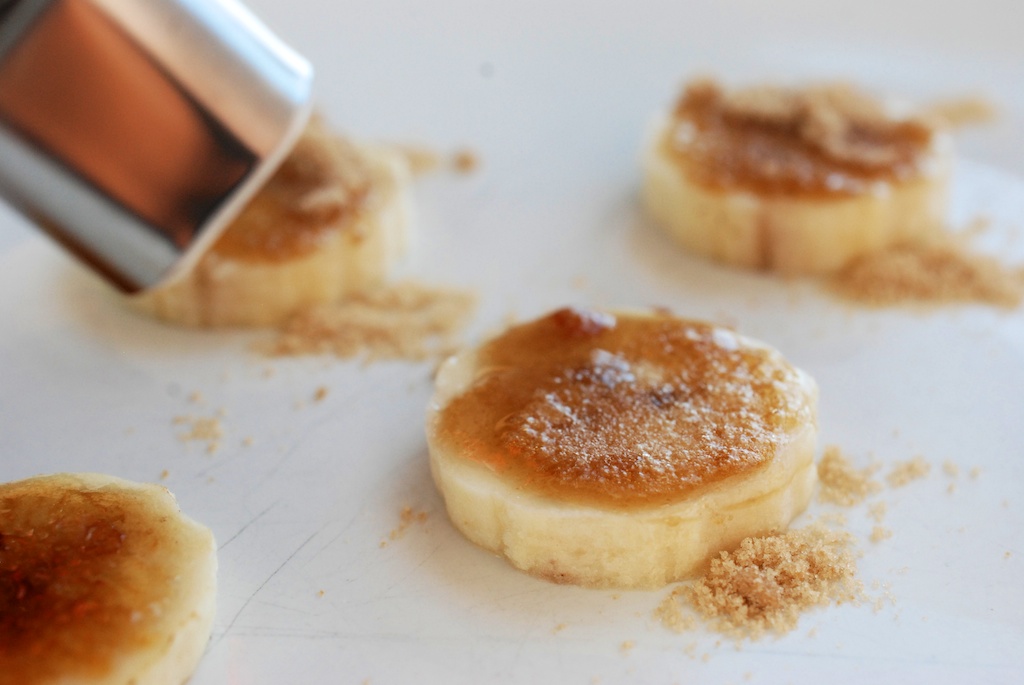
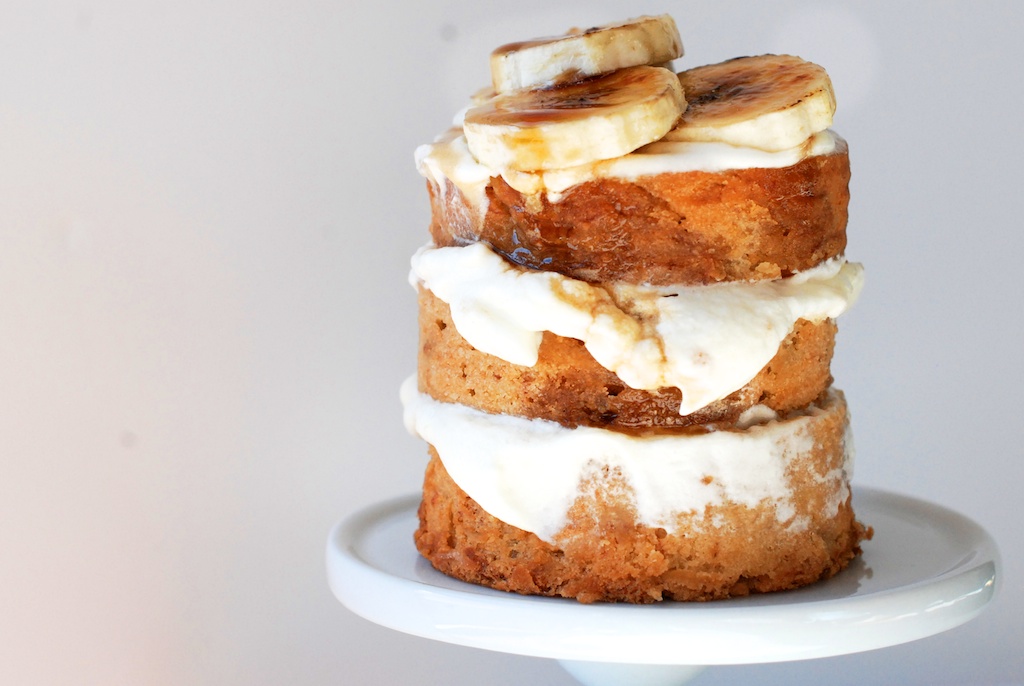
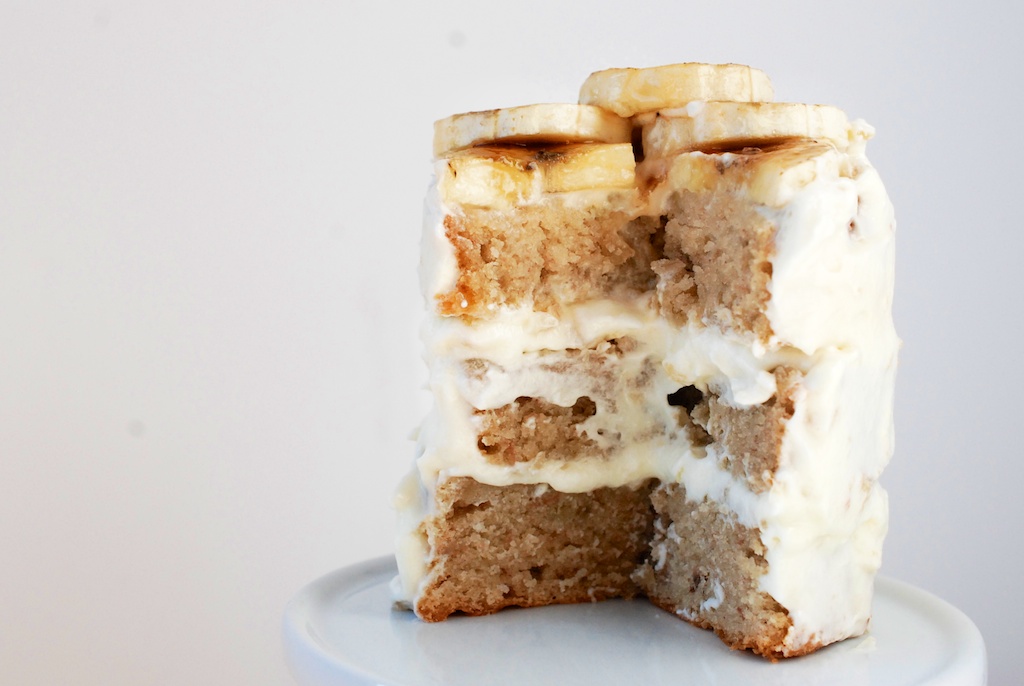
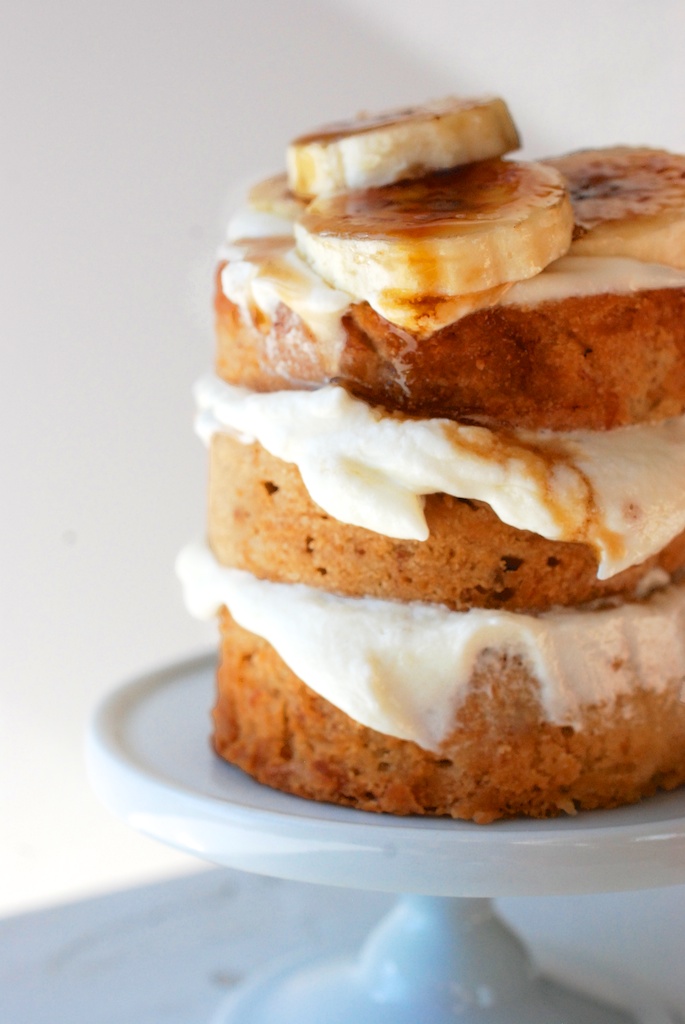
After baking, feel free to adorn this cake however you like. To be honest, it tastes great as it is, warmed with just a swipe of butter. But of course you can frost it, as fancily or as rustically as you like. You can crush up some walnuts, hazelnuts or cashews as garnish, or do as I did and brûlée some banana slices.
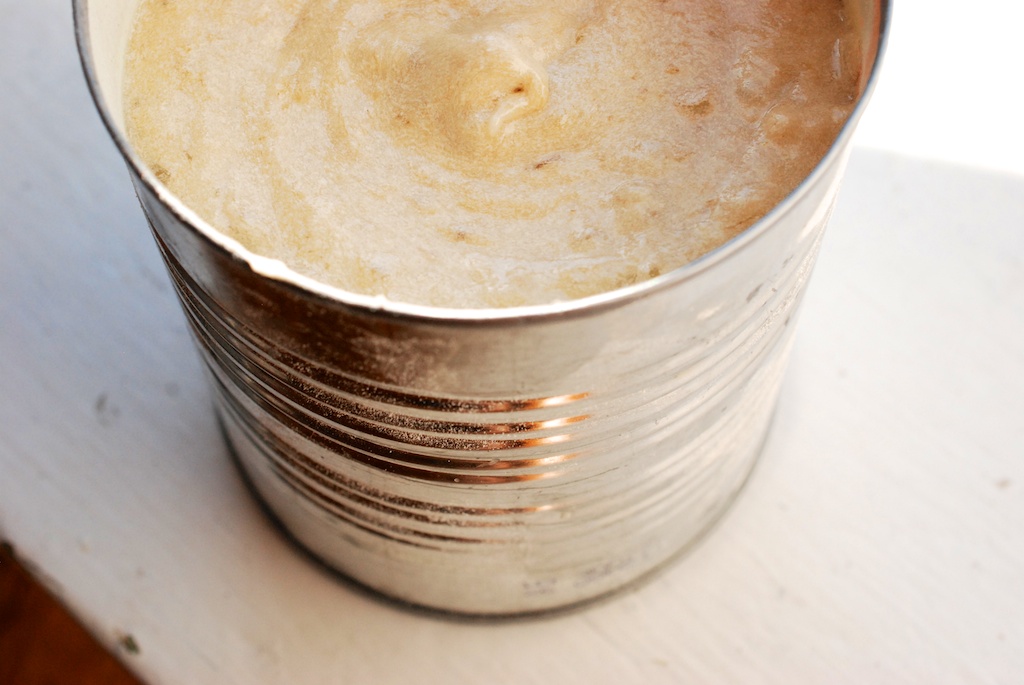
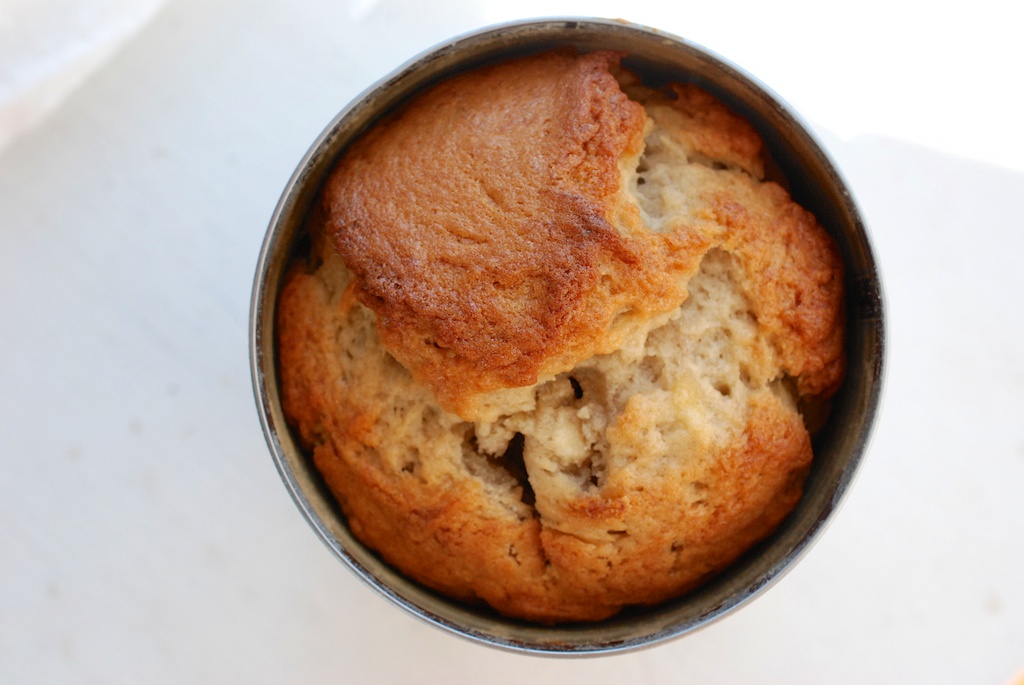
Also, you can make this cake birthday cake-style, but lately I have taken to baking it in cans of various sizes. It’s more manageable for smaller groups of people to consume, and this way you can decorate each one in a slightly different way.
*Note: I have since consulted my mother about this story. In response to my questions about the outcome, she read me a very hilarious short story my sister wrote in eighth grade called “Sweet Deceptions”. (I’m working on getting my hands on a copy. You’re welcome.) In actuality, it was my sister who thought up the whole lie unassisted, all because bringing in a food item for “International Day” would eliminate her lowest quiz grade. (She was in 4th grade at the time; yes, our family is nuts.)
When my mom asked my sister if should would like to frost the cake, or simply dust it with powdered sugar for the class, my sister said, “Powdered sugar, definitely. We want it to be good, but not so good people like it too much and ask for the recipe.”
Family of lawyers indeed.
Makes 2, 8-inch cakes, or a couple of can-fulls
Cake Ingredients:
- 1 stick unsalted butter, room temperature, plus more for greasing the pan
- 3/4 cups golden sugar
- 3/4 cups white sugar
- 2 eggs, room temperature
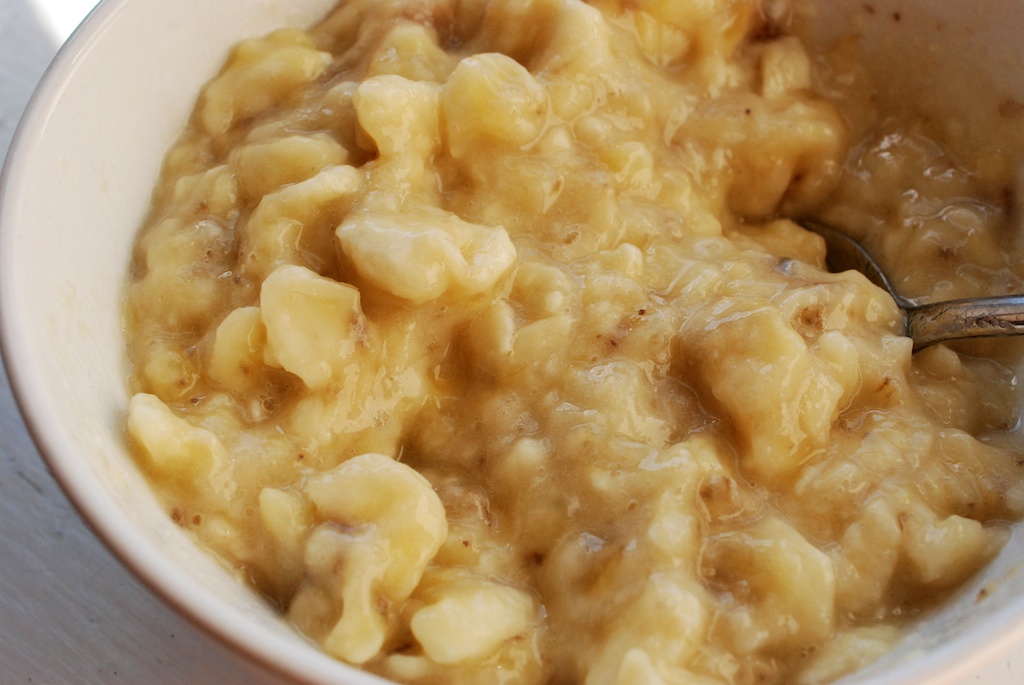
- 1 cup mashed bananas (about 4)
- 1 teaspoon vanilla
- 1 teaspoon lemon zest
- 2 cups cake flour (all purpose works too), plus more for dusting the pan
- 1/2 teaspoon baking soda
- 1/4 teaspoon sea salt
- 1/2 cup whole milk
Cake Procedure:
1. Heat the oven to 350F.
2. Grease whatever pan(s) you are using: This batter will yield enough batter to make 2, 8-inch cakes. As you can see, I’ve decided to play around with tin cans. Regardless of what size pan you use, grease each pan with softened butter and then dust with flour. (Here’s a trick: make vertical brushstrokes up the sides of each cake pan. This will help the cake rise.)

3. In a large bowl, cream the butter with the sugars for 2-3 minutes. (Use the beater attachments on a mixer. If you’re beating by hand, go a little longer.) The idea is to thoroughly blend the sugars, and to aerate the butter, which will give you a soft and lovely cake texture.
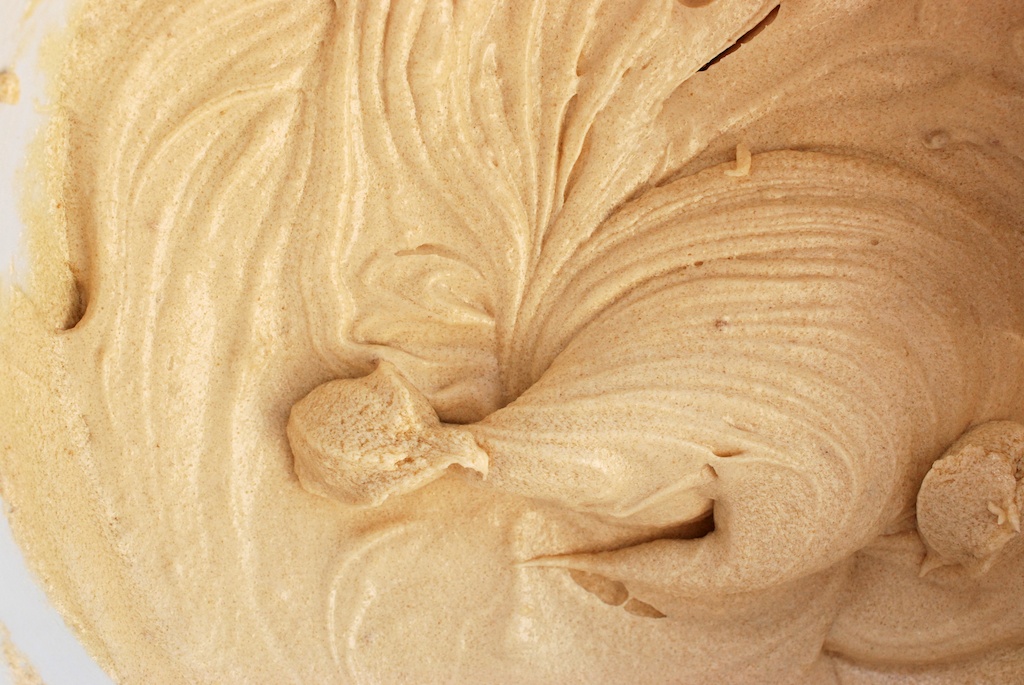
4. In a small separate bowl, lightly beat the eggs. Pour them into the bowl with the sugars and the butter. Beat for another 1-2 minutes.
5. In another small bowl, mash up the bananas. Add them to the butter bowl, along with the vanilla extract and the lemon zest. Mix until just combined.
6. Sift the flour together with the baking soda and the salt.
7. Alternately add the flour and the milk to the butter bowl, until just combined. You don’t want to overmix.
8. Fill whatever pan(s) you are using about 3/4 of the way to the top. The size of the pan you use will determine baking time. Start checking after 20 minutes, although it could take as long as an hour. You are looking for a golden cake top, and for a knife to come out clean.
9. Allow the cakes to cool for about 20 minutes. Then, run a knife around the edges of the cake. This should make it easier to tip them out the pans. Allow them to cool completely on a wire rack. When the cake is completely cool, slice off the top. (This nubbin is for you and you alone.) Slice up the rest of the cake and frost however you like:
Frosting Ingredients:
- 3 egg whites
- 2/3 cups cups sugar
- 1 tiny pinch of sea salt
- 1 cup (2 sticks) unsalted butter
- 1 teaspoons vanilla extract
- 1 tablespoon fresh lemon juice
- 8 ounces cream cheese, room temperature
Frosting Procedure:
1. Bring a pot of water to a simmer over medium heat. Meanwhile, add the egg whites, the sugar, and the sea salt to a metal (read: heatproof) bowl and set it over the warm water. Whisk the egg whites together with the sugar for 2-3 minutes without pause, until the whites heat up and look silky smooth. (You can touch a bit between your fingers to check–you want the sugar to have dissolved completely.) Take the bowl off the heat.
2. For this next step, it’s really great to have an electric mixer. (Otherwise, prepare to have a sore arm.) Using a whisk on high speed, beat the whites until they form firm and lacquered peaks. The whole shebang takes about 10 minutes. (I know, I know. Trust me, it’s worth it.)
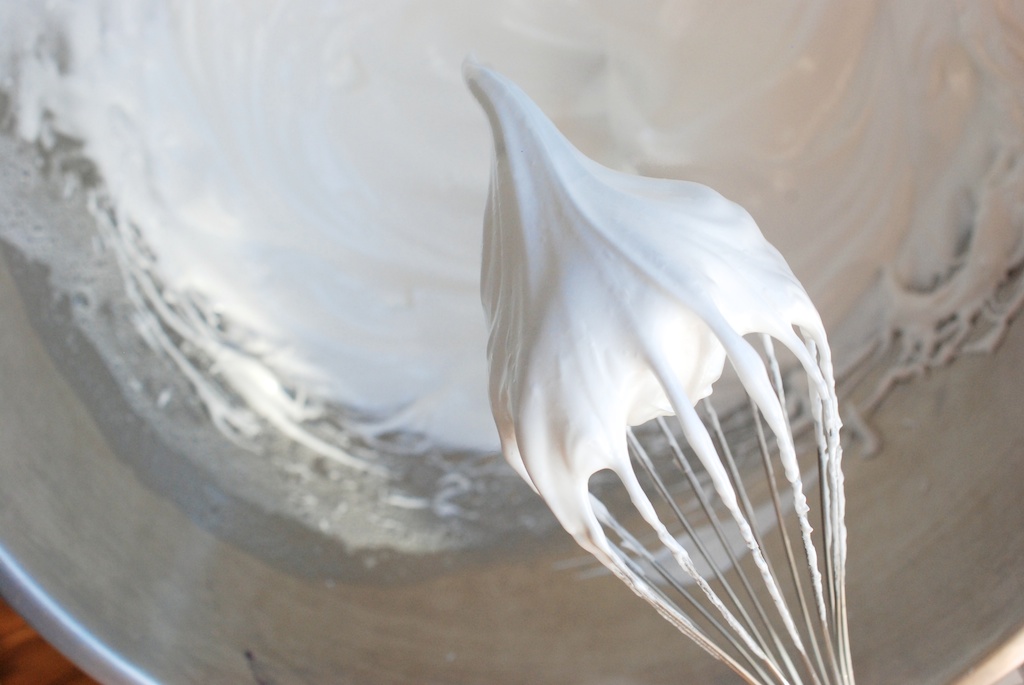
3. Cut the butter into pieces, and add it bit by small bit to the whites. You want to incorporate each piece of butter before you add some more. Remember: just keep beating, just keep beating. Even if it seems like the butter is separating and that all is wrong with the world, I promise that if you keep at it, the frosting will come together.
4. Add the vanilla and the lemon juice and combine. Add the cream cheese, in pieces, little by little, just like the butter. Again, don’t be deterred if the whole thing starts to separate on you. You are strong. You will get through this. Mix until it resembles frosting, about 10 minutes. You should be left with a light, fluffy frosting.
5. If the cakes are cooled by now, you are ready to go. Feel free to get fancy with a few decorative flourishes, if you like.

You can also put the frosting in the fridge for about 20 minutes, just to firm it up a little. If you have any extra frosting at the end, you can store it in the fridge for a few days. Just take it out of the fridge to thaw about 30 minutes before you want to use it.
As the star of this story I think I am owed some “plantain” bread. WITH frosting.
Haha, come on over!
Wow, that looks so good. Were you baking those cakes in a tin can? Holy cow, I’ve never seen that done before and I’ve been around the block a few times – what a clever way to get a really cool cake shape! Kudos!
Thanks, Jenn! I have to admit, I didn’t come up with the tin can idea myself, but I really do like baking in them: the smaller size let’s you customize and decorate more easily. Plus, they are perfect when you don’t have a million people to feed.
What a lovely story, I enjoyed reading the entire thing! Looking forward to trying this recipe. Thank you for sharing
Thanks, Jade! I hope you will try it.
This looks great and I can’t wait to try this! The tin cans are a great idea. Wonderful for “tea time”!
Thank you!
This looks FANTASTIC
I like bananas. They are good and healthy
Where it says egg yolks, it is supposed to say egg whites… (learned this the hard way). Do NOT put the egg yolks in!
Yeesh, I see the mistake. It’s been fixed!
You have made a special memory and cake even better!
Oh this looks super delish! Thanks for sharing your fab recipe with us.
Well, it’s just awesome! I’ve never thought of such solution… but now I must try that.
Thank you for such an innovate tip!
I just adore how imperfectly perfect it is. My mouth is seriously watering!
Thanks, Jacquelyn. That’s what happens when you’re too impatient to wait for a cake to cool before you frost it!
Holy crap this cake looks delicious! But one problem for me… the idea of baking in a tin can REALLY freaks me out. I know that highly acidic foods can cause higher levels of BPA to leech into food. I can only imagine what heating it would do. BPA is an endocrine disrupter and really harmful to a developing child’s system. Please don’t take this as a criticism at all. I am just trying to be helpful.
Hi, Elizabeth. I totally understand your concerns; there are cans without BPA, though! (For example, I eat a lot of Eden Foods beans.) However, if you don’t want to bake in cans at all, there are other ways to create cute little cakes. You can bake the cake as usual (this recipe yields 2, 8-inch cakes), and then use circular cookie cutters to make mini cake “layers”. Bake any way you are comfortable, and enjoy!
Awesome! I wasn’t sure how easy it would be otherwise. I love the way it’s like a mini layered cake. Thanks for the helpful tips!
new to pintrist….how do I print recipe?
Hi Diane. Since Pinterest is mostly pictures, I’m don’t think you can print recipes. Currently my website doesn’t have a ‘print format’ feature, but maybe sometime in the future! For now, my best suggestion is good old copy/paste.
Diane, I have added a Print button at the bottom of the recipe. Happy baking!
I have been staring googly-eyed at this for 2 days in a row. I just went out and bought the goods and could not be more enthusiastic/optimistic about this endeavor. May the baking gods be on my side! PS I’m so glad I found (was directed) to your blog!
Thanks, Sarah! (And thanks to whoever directed you to my blog.) I hope the cake is everything you’re hoping for!
I can’t wait to try this recipe. Plus, I have been looking everywhere for a good, stable cream cheese SMBC!! Is this stiff enough to pipe?
Hi Risa, You should be good to go on the piping. The frosting isn’t crazy stiff, but it should be stiff enough to pipe, as long as you are patient enough to let the cake cool! I’m usually not…
Haha, thanks Cristina!! I’ll definitely give it a shot!